How to Change Oil Filter in a Car
Learn how to change oil filter for your vehicle today. Find out what are the correct steps to changing oil filters from a real mechanic.
As a professional mechanic, I have performed lots of oil changes through the years and replacing oil filters is always part of a complete oil change.
While there are many guides on how to change oil filter for a car, mine will focus on the easiest methods and best practices, including what are the common mistakes to avoid. To save time avoid frustrations, I recommend that you read the entire guide first.
Tools Needed to Change Oil Filter
Before performing an oil filter change, you will need to jack up your vehicle, place it on jack stands and drain out the motor oil. Here is full list of tools required for an oil change and oil filter replacement:
Recommended Tools and Parts for Changing Oil & Oil Filters
Motor Oil: Click here to find one for your vehicle make and model
Oil Filter: Click here to find one for your vehicle make and model
Floor Jack: Torin T83006 3 Ton Hydraulic Trolley Floor Jack
Gas Can: Garage Boss GB320 2 Gallon Press N Pour Gas Can
Funnel: Hopkins Multi-Purpose Funnel
Jack Stands: Torin T43002 3 Ton Jack Stands
Oil Drain Pan: ATD Tools 5184 4.5 Gallon Black Drain Pan
Oil Filter Pliers: Tekton 5866 12 Inch Filter Pliers
Socket Wrench Set: Dewalt DWMT73804 34 Piece Socket Set
Strap Wrench: Boa BO13010 Constrictor Aluminum Strap Wrench
Wheel Chocks: FloTool 11930MI Heavy Duty Wheel Chocks
Work Gloves: Wells Lamont 167L Heavyweight PVC Gloves
To troubleshoot, repair and maintain your vehicle, you'll need diagnostic and repair information that is specific to your car or truck. For this I personally use and recommend ALLDATAdiy. With full manuals for over 30,000 vehicles online, you will find an exact match for your vehicle's year, make and model.
Besides being cheaper than a factory manual, they also offer step by step repair instructions and detailed diagrams beyond what is found in most printed manuals. Click here for a sample of their diagnostic and repair information.
1. Remove Oil Filter
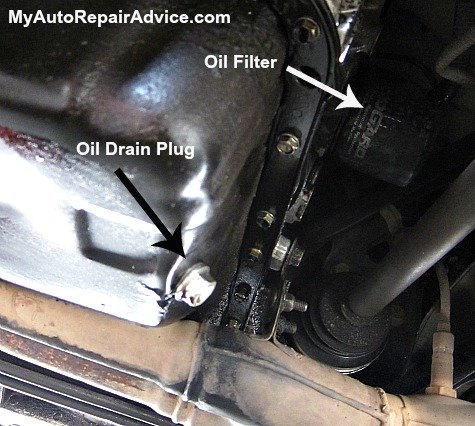
How to change oil filter: Now that you have everything you need and the car is jacked up enough for you to crawl under it you need to try to loosen the oil filter by hand.
Don't put the drain pan under the car yet. It is big and bulky and just gets in the way. You will most likely need to try different positions in order to get the best torque (twisting force) on the oil filter. Be sure to wear work gloves when you are trying to loosen the filter. These types of gloves will give you extra grip on the filter and they will protect your hands from used oil.
If you cannot get it to loosen then you will need to use a strap wrench. If there isn't enough room for that then you have to resort to oil filter pliers - This is a special tool that will adjust to the diameter of your oil filter and and create a vice-like grip. These work great to loosen very tight oil filters.
2. Drain Oil Filter
After you break it loose, be sure to put the oil drain pan under it before you loosen it any more. After you get the oil drain pan under the oil filter then you can go ahead and loosen it the rest of the way. It is important to have gloves on and to be in a position in which the oil won't run all the way down your arm.
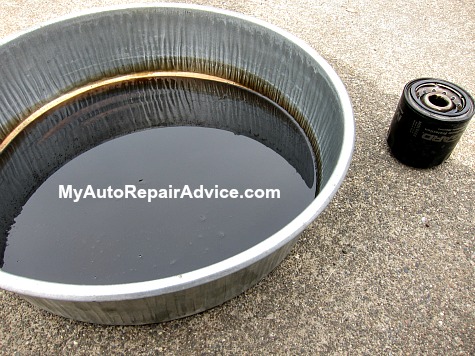
As soon as you get the oil filter off, just take it and put it face down in the drain pan. Look at the mounting surface where the oil filter attaches to the engine. Be sure that the gasket from the old filter is not stuck to it and if it is then remove it. It's also a good idea to clean this surface.
After you move the drain pan out from under the car you will need to tip the oil filter up on its side so all of the oil can drain out. Let the filter drain for 24 hours, then you can throw it in your household trash.
3. Lubricate Oil Filter Gasket
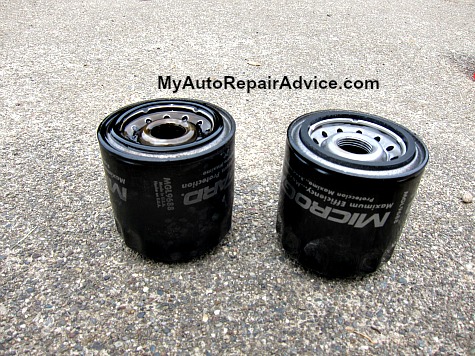
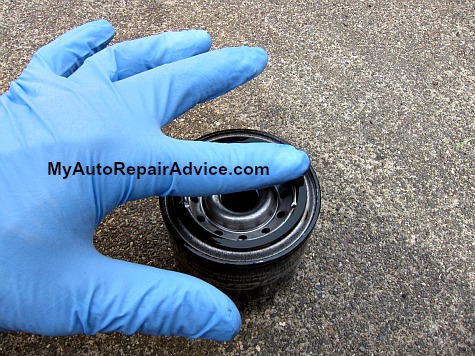
Unpack your new oil filter and use some fresh motor oil to lubricate the gasket on the new oil filter. This will help to ensure a tight and leak-free fit on the engine. If the filter sits straight up and down on the engine, it's a good idea to pre-fill the filter with motor oil too.
The reason for this is because when you first start the engine after the oil filter change there will be virtually no lubrication because the oil pump will have to fill the filter with oil first. If it is already full then you will get lubrication to your engine much sooner.
4. Change Oil Filter
So far you have removed the oil filter, checked that the oil filter sealing surface on the engine is clean and oiled the oil filter gasket on the new one. Now it's time to get yourself into position to put the new filter back on.
At this stage of replacing an oil filter, it is crucial that you keep the top of the oil filter covered as much as possible while lifting it into position. You can do a lot of damage to the engine if dirt or other debris gets into the oil filter.
Once you get it into position start turning it to tighten. Be sure to not put too much pressure on it while you are getting it started. If you put too much pressure on it while turning it you can end up getting it cross-threaded and that would ruin your whole day. This can be an expensive fix.
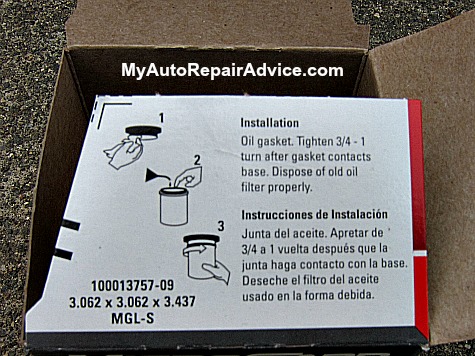
Just be sure to start it gently. You should be able to feel it start threading on. As soon as it starts threading on I spin it fairly fast. The reason for this is so that I can watch it spin and when it suddenly stops I know that the oil filter gasket has contacted the engine block. This is an important thing to know because you only need to turn it 3/4 of a turn after the initial contact with the engine block.
This step for changing oil filters isn't exact science. If the filter is a little too tight it's not a big deal, but you don't want it to be too loose. If in doubt, tighten it a little more.
Now that you know how to change oil filters, lets move on and learn how to put oil in a car.
New! Comments
Have your say about what you just read! Leave me a comment in the box below.